Updating eCTAS User's Sites and Roles
Assigning Sites and Roles
Watch the Assign Sites and Roles tutorial
- Log into Site Role Management.
-
Select the Registered or Not Registered list using the radio buttons.

Note: - Not Registered: users do not have access to eCTAS because they have not been assigned a site or role. Users appear on this list after they have ONE® ID accounts enrolled to the eCTAS service, and have acknowledged the End User License Agreement (EULA) - select this list to assign sites and roles for a user.
- Registered: users have access to eCTAS because they have been assigned site(s) and role(s) - select this list to update or remove sites or roles for a user.
- Select a user from the list using the radio buttons. Their username should appear in the blue User Information Panel at the bottom of the screen.
- Open the User Information Panel for the selected user by clicking on the blue User Information Panel bar at the bottom of the screen.
- Add sites and roles as needed. There is no save button because changes are saved dynamically.

Important: if a new user's name does not appear on the Registered list, this is an indication that requisite steps have been missed, see Steps for setting up new eCTAS user accounts. To assign sites for a user:
To assign roles for a user at a specific site:
-
Use the down arrow to the right of the Select Site box to select the correct site from the list.
-
Use the + button to the right of the Select Site box to add the site. The selected site will appear in the Selected Sites list.
-
Click on a site in the Selected Sites list.
-
Use the down arrow to the right of the Select Role box to select the correct role from the list.
-
Use the + button to the right of the Select Role box to add the selected role.
The role will now appear in the Selected Roles list for the selected site.
User Information Panel

-
Removing Sites and Roles
Watch the Remove Sites and Roles tutorial.
- Log into Site Role Management.
- Select the Registered list using the radio buttons.
Note: - Not Registered: users do not have access to eCTAS because they have not been assigned a site or role. Users appear on this list after they have ONE® ID accounts enrolled to the eCTAS service, and have acknowledged the End User License Agreement (EULA) - select this list to assign sites and roles for a user.
- Registered: users have access to eCTAS because they have been assigned site(s) and role(s) - select this list to update or remove sites or roles for a user.
- Select a user from the list using the radio buttons. Their username should appear in the blue User Information Panel at the bottom of the screen.
- Remove sites and roles as needed, there is no save button because changes are saved dynamically.
|
To remove sites for a user: |
To remove roles for a user at a specific site: |
|
|
|
User Information Panel
|
|
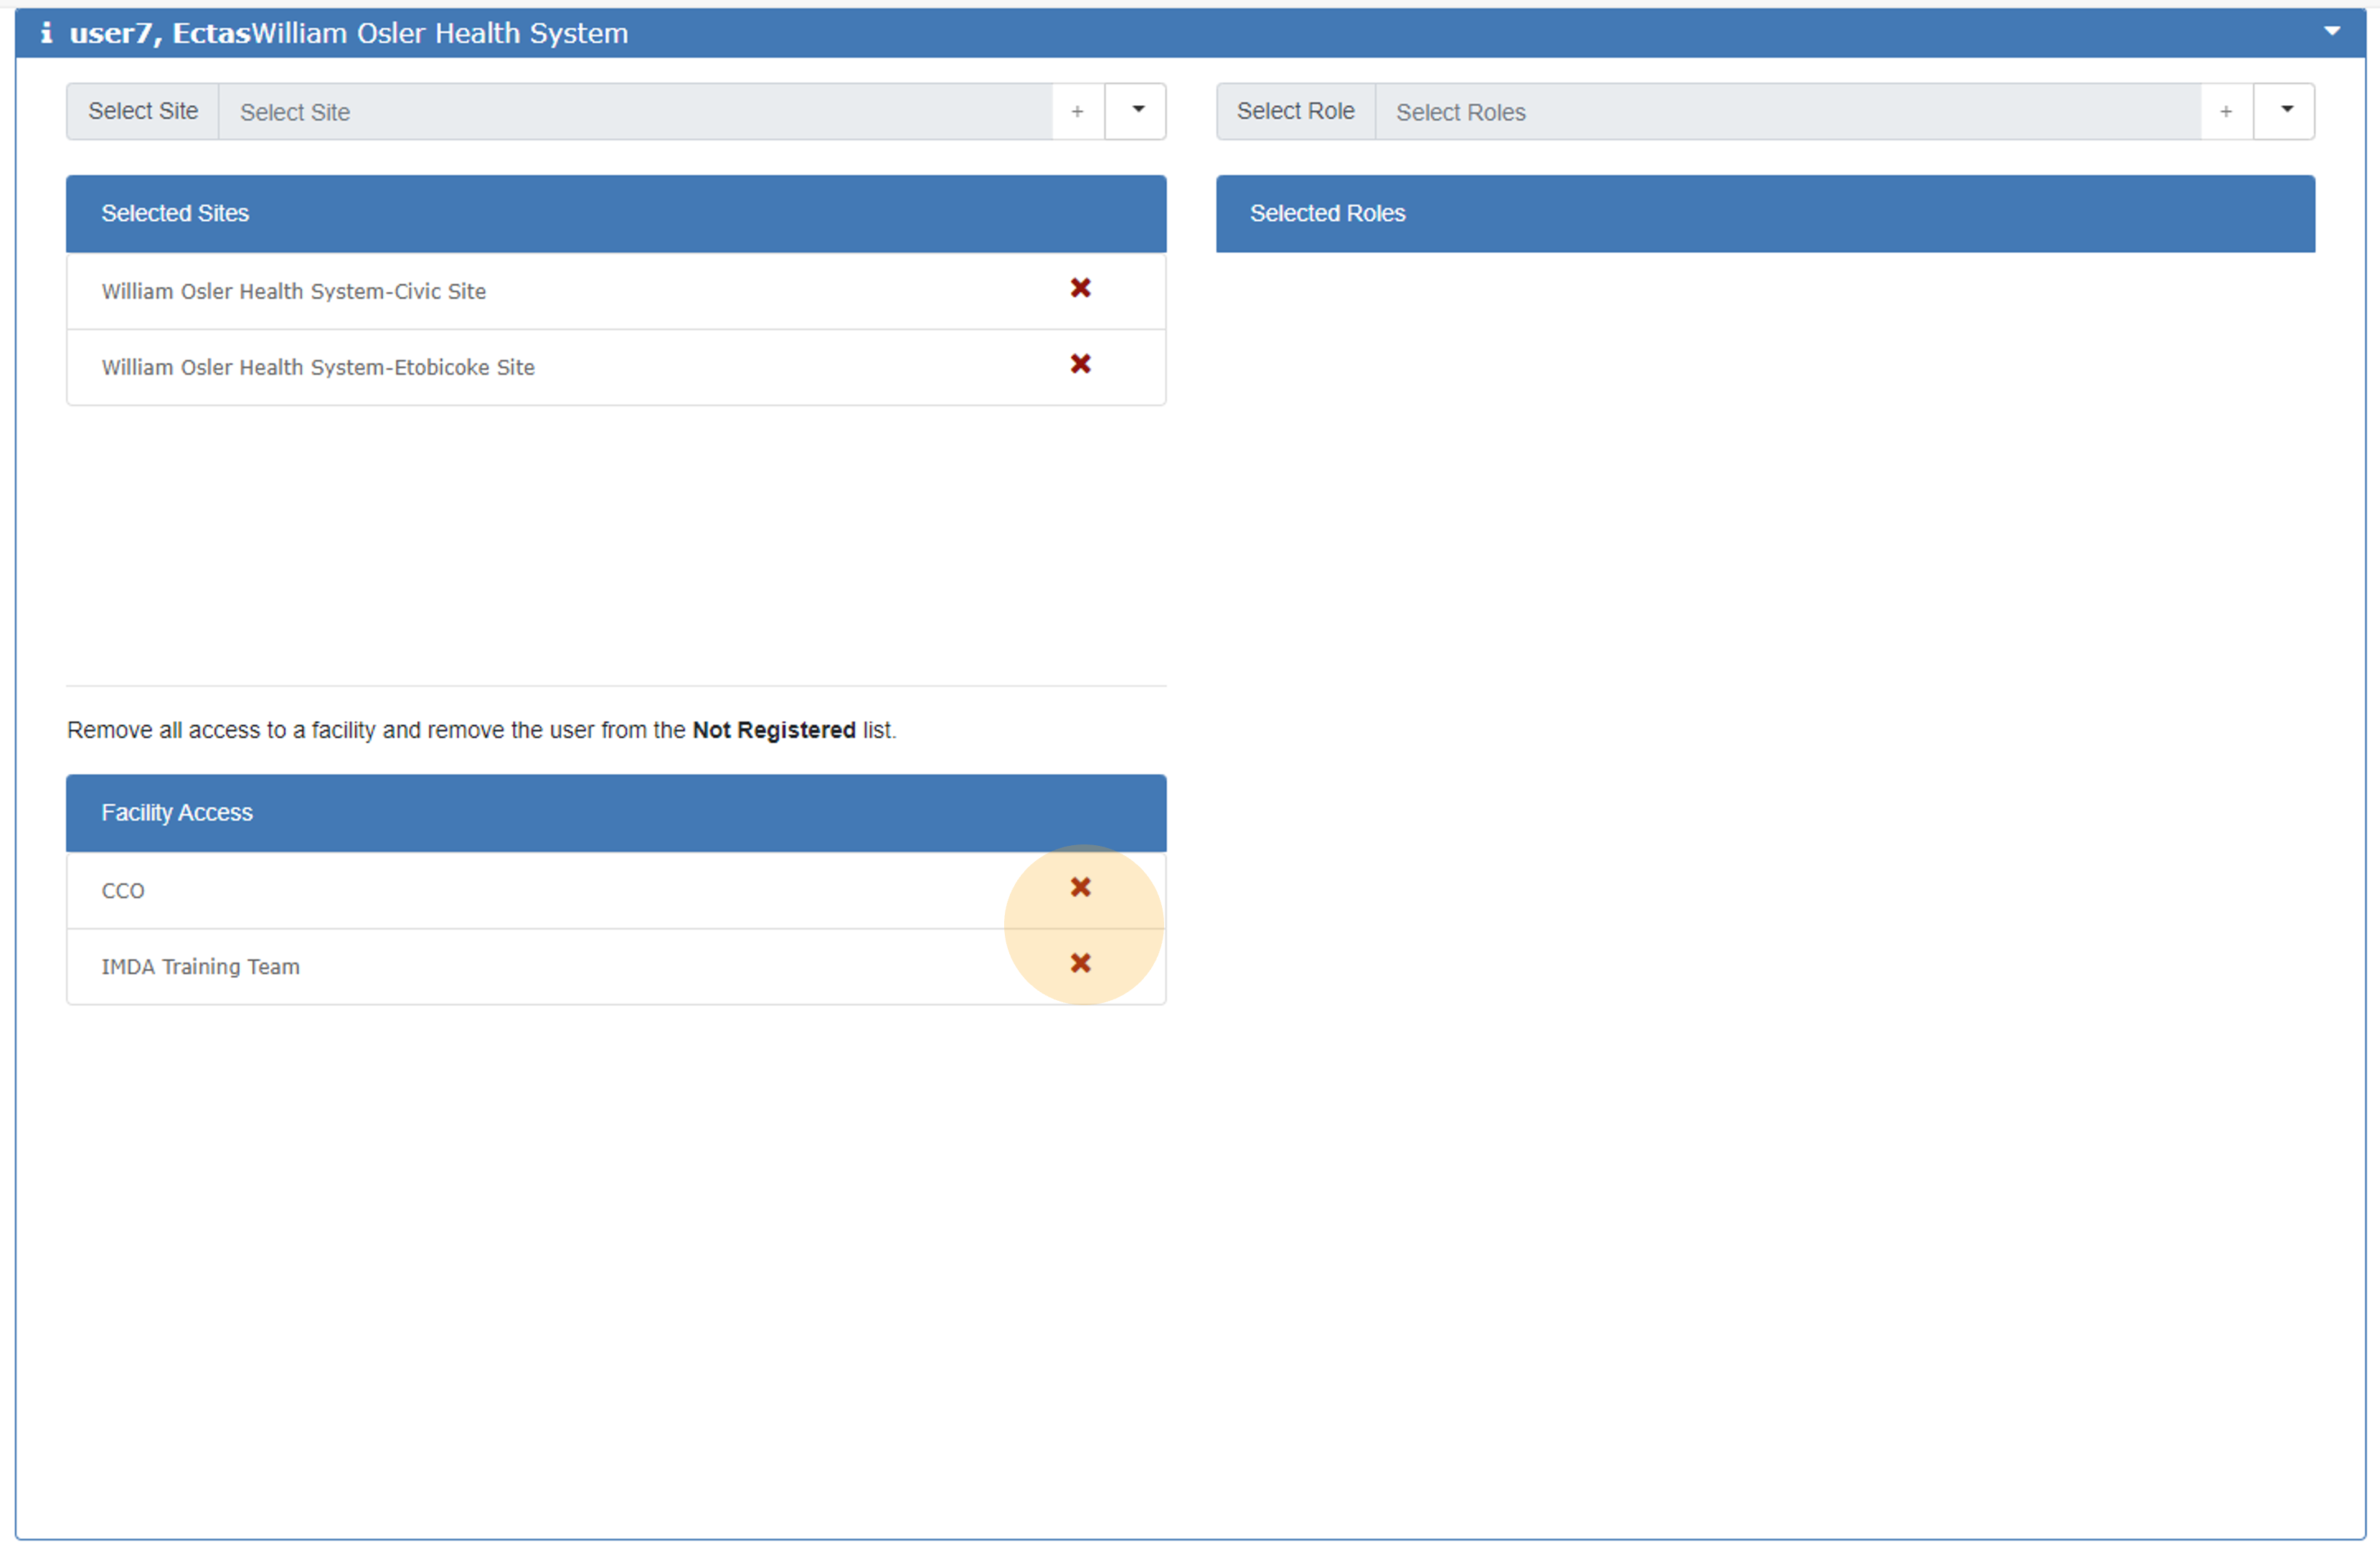
Removing All Access
- Log into Site Role Management.
-
Select the Registered or Not Registered list using the radio buttons to locate the user.
Note: - Not Registered: users do not have access to eCTAS because they have not been assigned a site or role. Users appear on this list after they have ONE® ID accounts enrolled to the eCTAS service, and have acknowledged the End User License Agreement (EULA) - select this list to assign sites and roles for a user.
- Registered: users have access to eCTAS because they have been assigned site(s) and role(s) - select this list to update or remove sites or roles for a user.
- Select the user from the list using the radio buttons. Their username should appear in the blue User Information Panel at the bottom of the screen.
- Remove facility access by clicking on the red x under the Facility Access section.
- This will remove any assigned roles from the user as well as remove the user from the Not Registered list.
| To remove all access for a user: | |
|
In the User Information Panel, click on the red x next to the site name under the Facility Access section. |
|
|
User Information Panel
|