4: Validating Procedure Maps
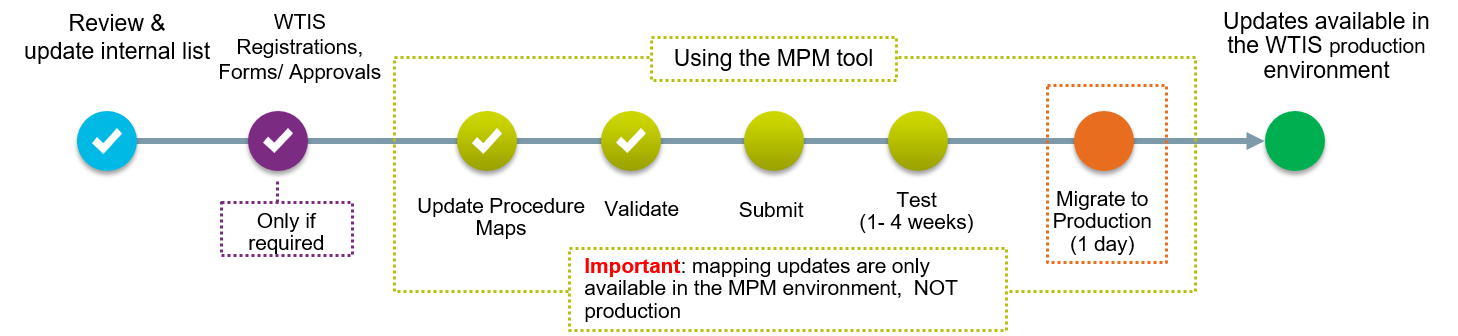
Once you have completed updates to your procedure maps, the next step is to validate. During validation, the system:
- Checks that mappings adhere to syntax and business rules one more time
- Flags any unmapped errors that may have been migrated in the past
To complete validation:
- Click the Validate button to check the procedure map against the WTIS business rules.
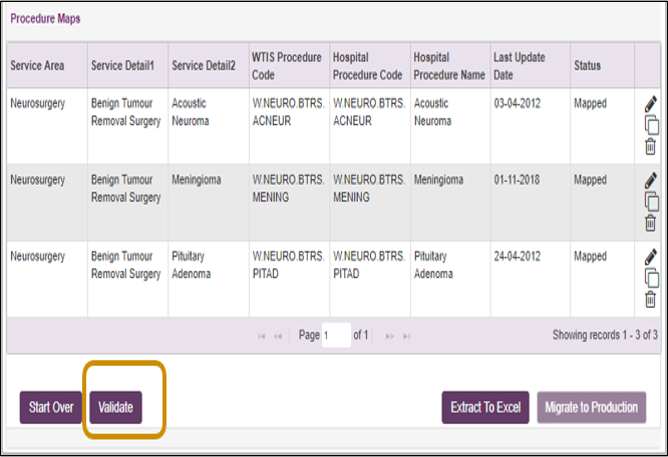
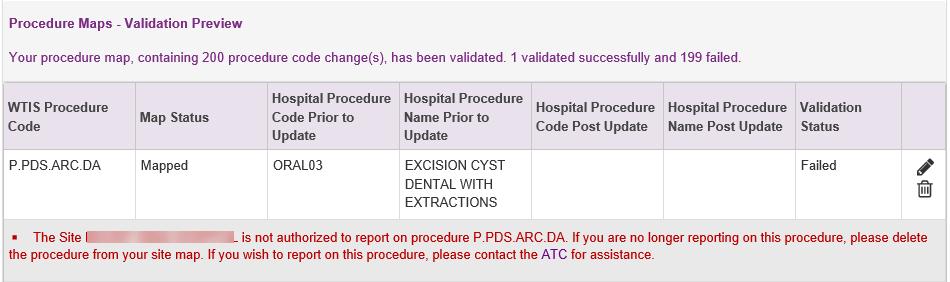
- Review the Validation Preview section which will appear at the bottom of the page, it will display:
-
A summary at the top (i.e. how many validated, successful, failed)
-
Mappings that pass validation will be listed with a status of Successful
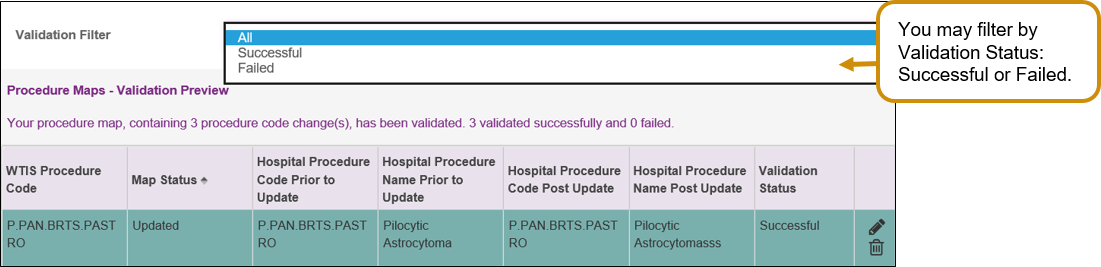
-
- Mappings that failed validation will display an error message in red and the validation status column will display “Failed”.
-
See Syntax and Business Rules for description of errors and suggested resolution
-
- Correct validation errors by editing or deleting the mapping as required.
To edit mappings
To delete a procedure mapping
-
Click the Update
 icon for the mapping you wish to update.
 -
Make the necessary changes.
-
Click the Save
 icon.
icon.
-
Click the Delete
 icon.
icon. -
If you deleted a mapping by accident, you may click the Undo
 icon
icon
-
- Click the Validate button again.
- When all mappings are successfully validated, proceed to next step, Submit.
| Tip: If you plan to update or change a large number of mappings at once, it is recommended that you validate and submit your changes in batches to simplify your validation process. It is easier to fix the errors right away. |